
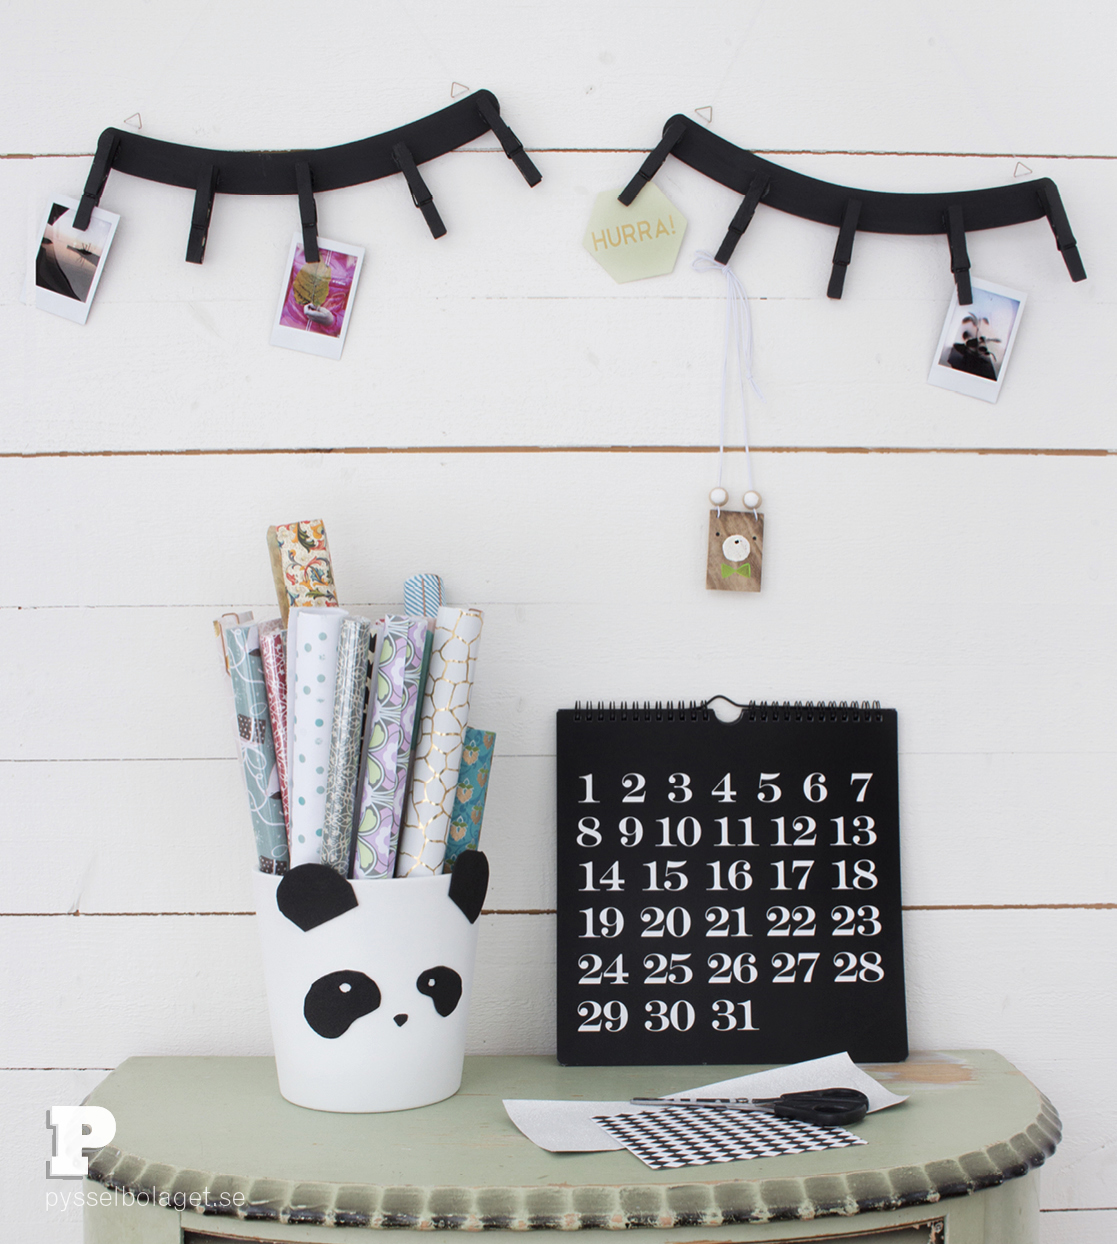
Nu är vi äntligen tillbaka från ett långt vinteruppehåll, och vi är väldigt pysselsugna. Hoppas att ni är det också, för idag kör vi igång med ett riktigt ordning-och-reda projekt. Vad sägs som en lite sömning anslagstavla för foton och att-göra listor? Det kan ju blir en del sånt så här i början på ett nytt år. Vi använder barngalgar och klädnypor för att göra den här någon annorlunda anslagstavlan. Häng med!
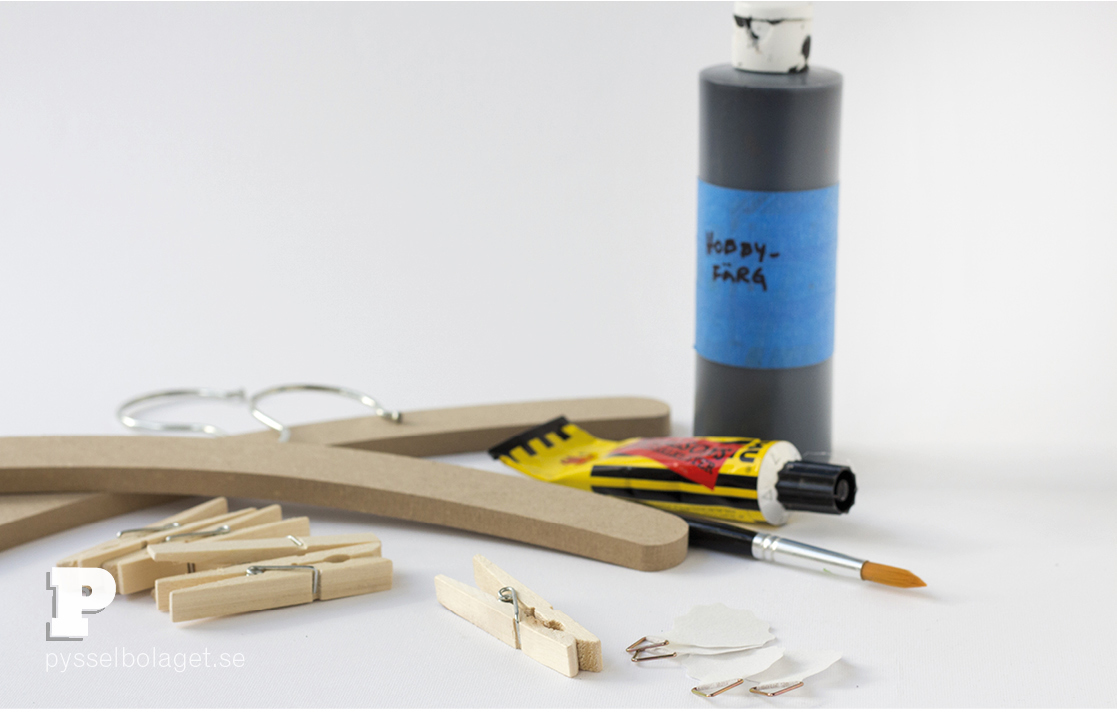
Ni behöver klädnypor i trä, två stycken barngalgar i mdf, hobbyfärg, pensel, kontaktlim och tavelkrokar i tyg.
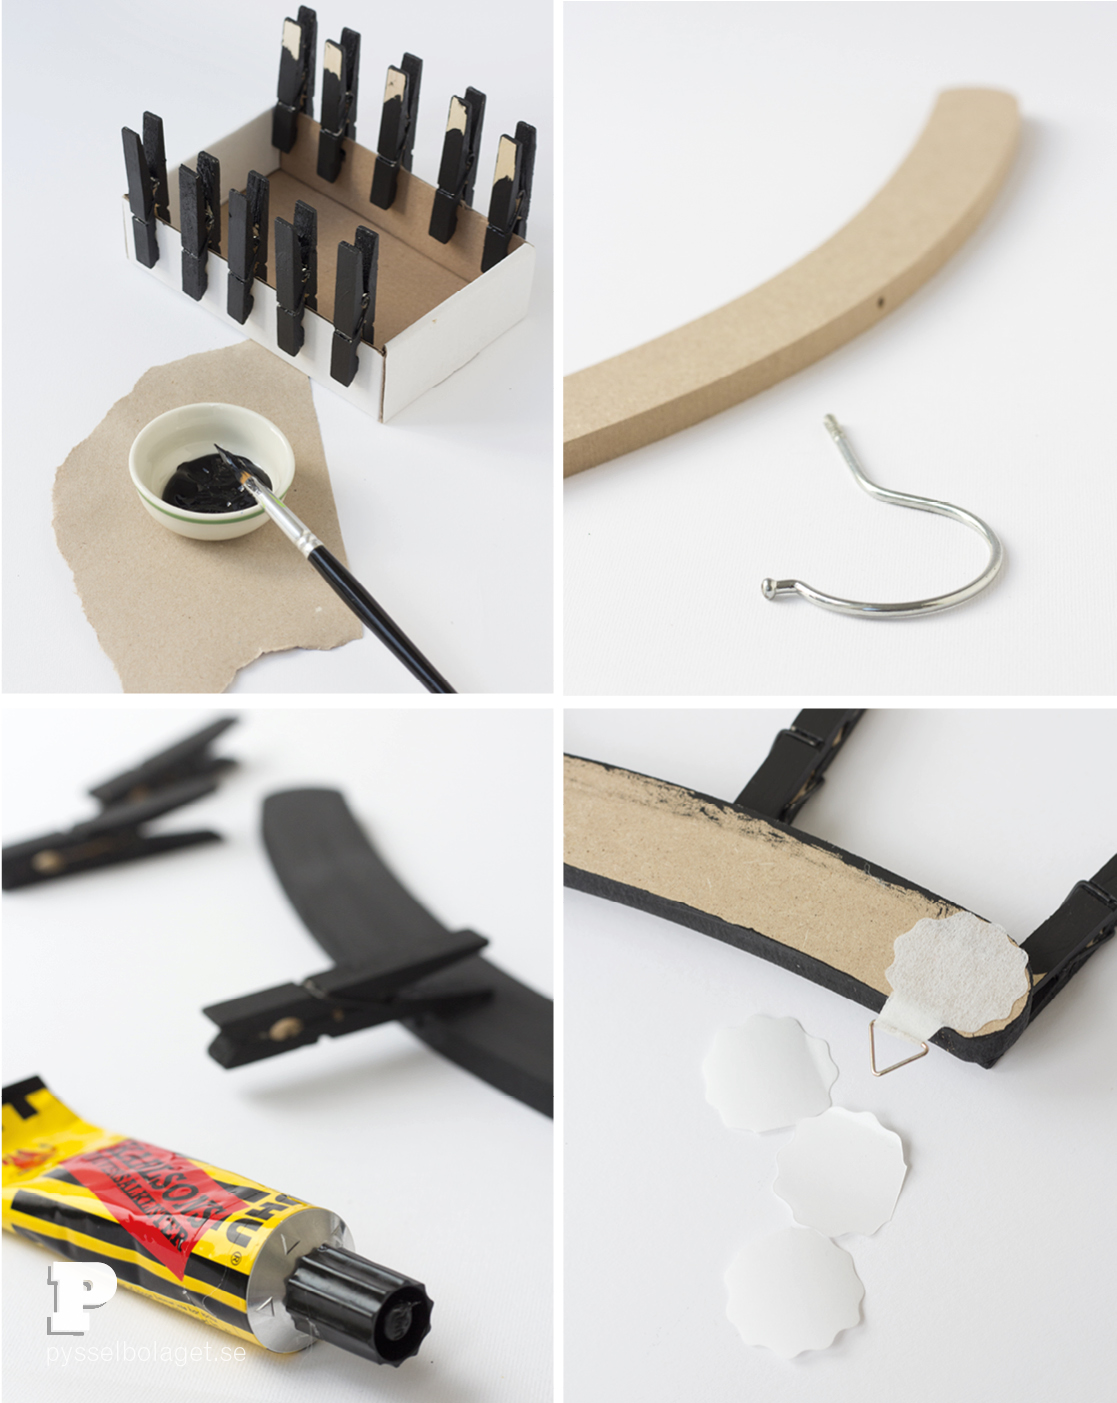
Börja med att måla alla klädnypor. Låt dem torka på kanten av en kartong. Det är inte så noga med färg på det som ska bli baksida på klädnyporna.
Skruva av kroken på galgarna och måla även dem.
När all färg torkat är det dags att limma klädnyporna på galgarna. Vi använder kontaktlim eftersom vi att klädnyporna ska sitta ordentligt fast. Låt limmet torka, gärna över natten.
Till sist fäster vi tavelkrokar, en i varje ände på baksidan av galgarna.
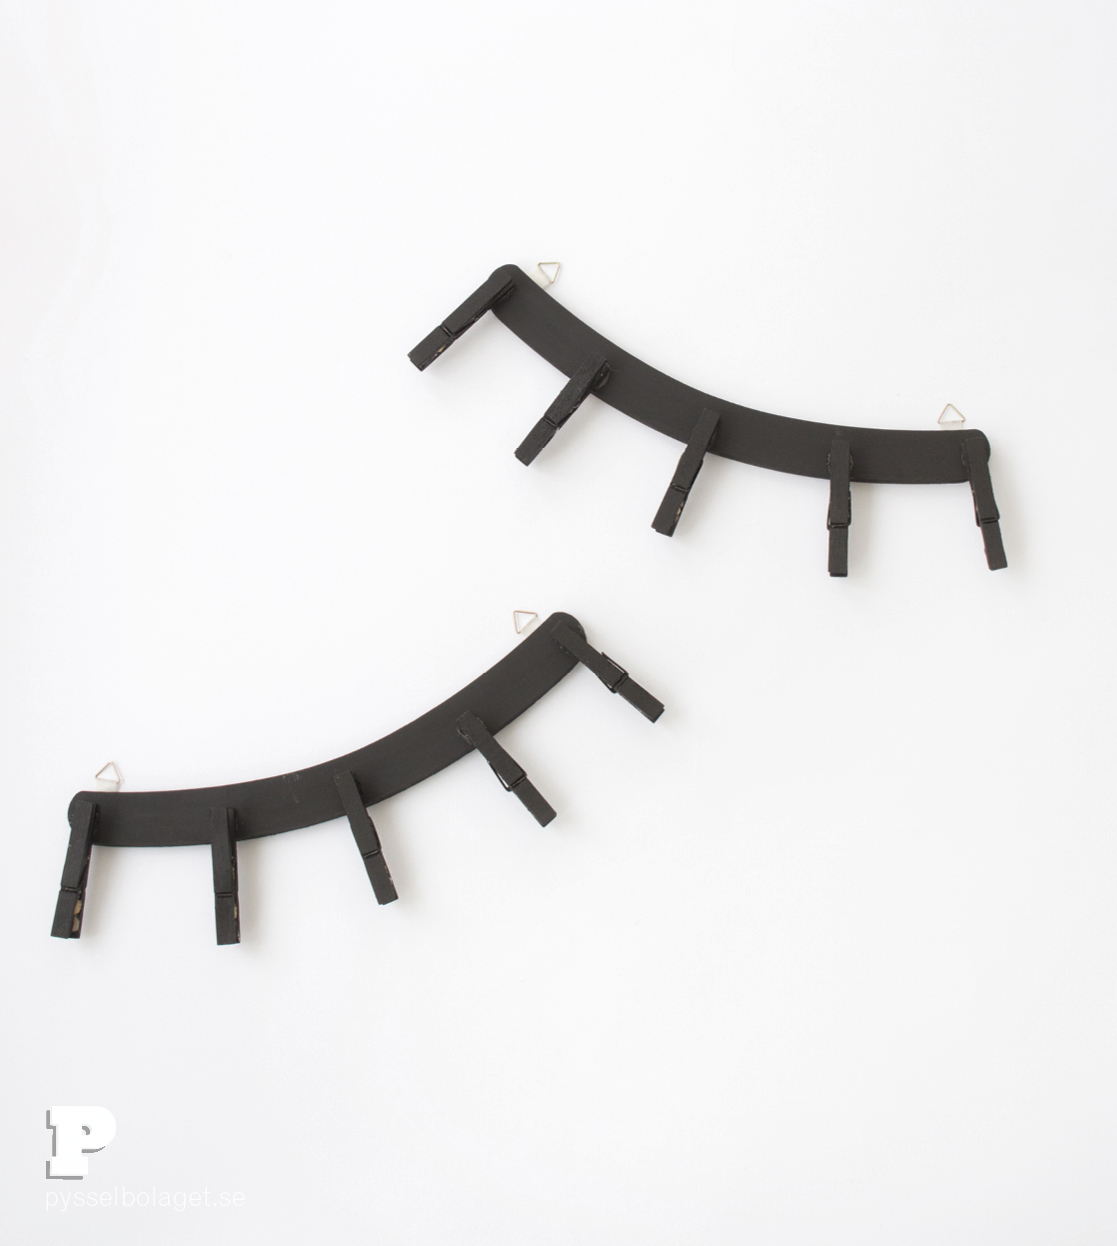
Vår något annorlunda anslagstavla är färdig. Ögonfransarna kan fästas på väggen antingen med en liten spik för varje tavelkrok, eller med en spik per öga och någon typ av snöre mellan tavelkrokarna.
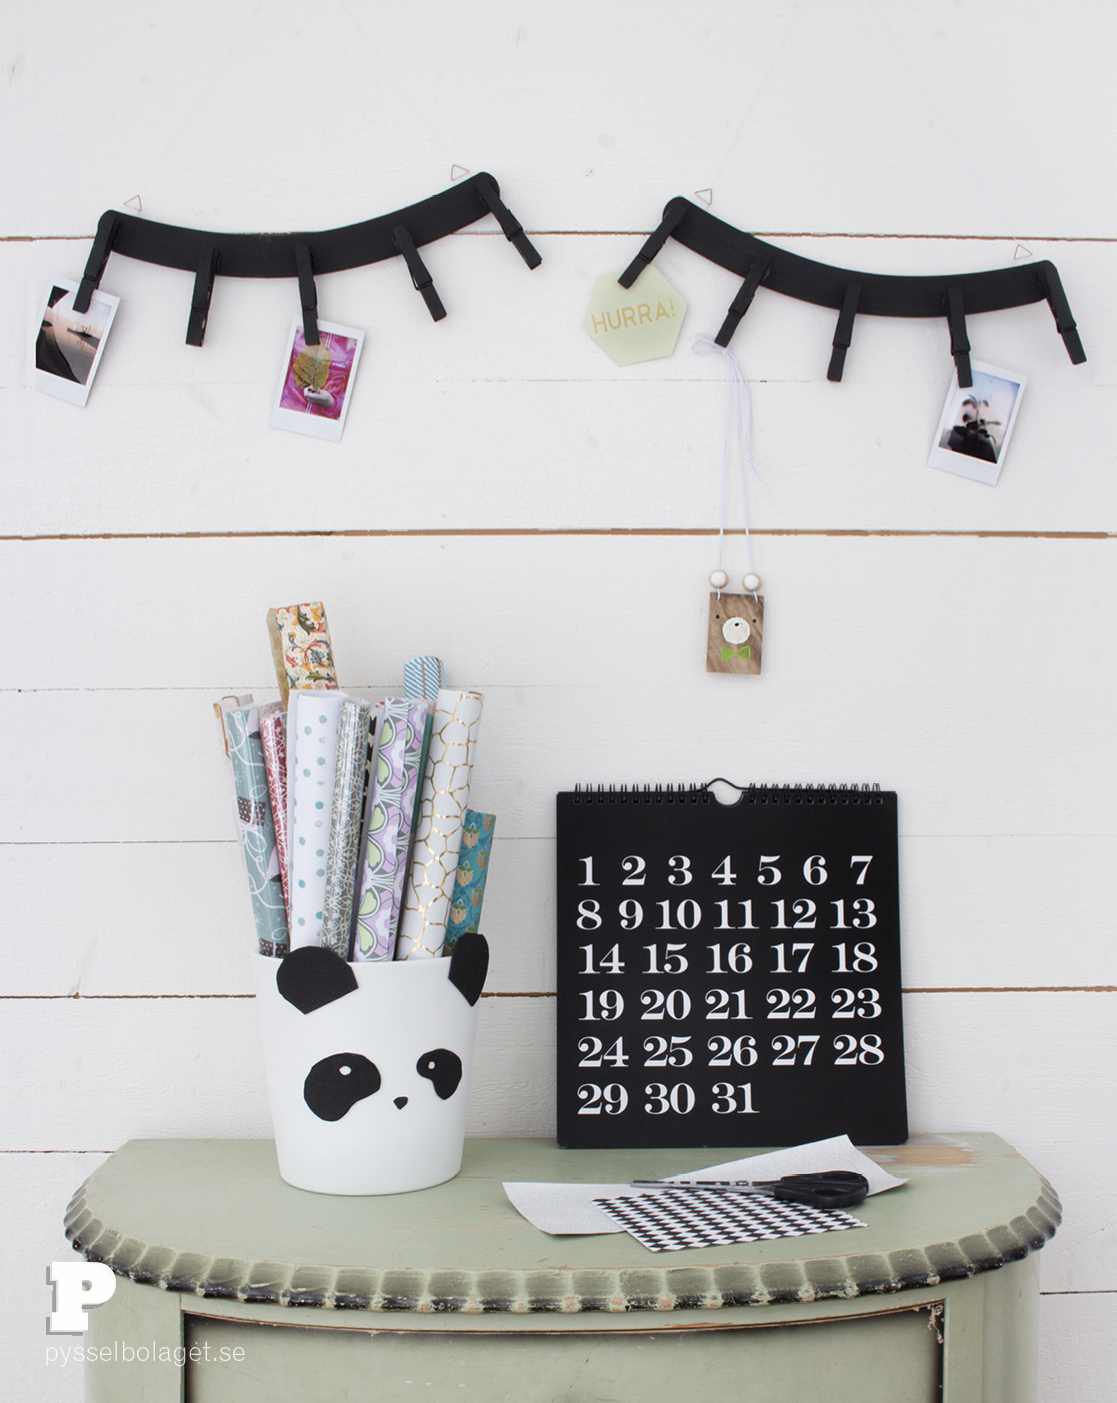
Vår sömniga anslagstavla är på plats! Just den här gången fyller vi den med foton, en påminnelse om födelsedagar som kommer och ett av våra djurhalsband. Kanske ni även känner igen krukan? Den har Freja gjort och den funkar som förvaring av mina fina papper.
Det känns härligt att vara igång! Vi har mängder med pyssel planerade för er i år – men det är också en och annan förändring på gång. Nu blev ni nyfikna, eller hur? Näst ut är i alla fall en tävling – det kan jag avslöja! Välkommen tillbaka då.
No Comments