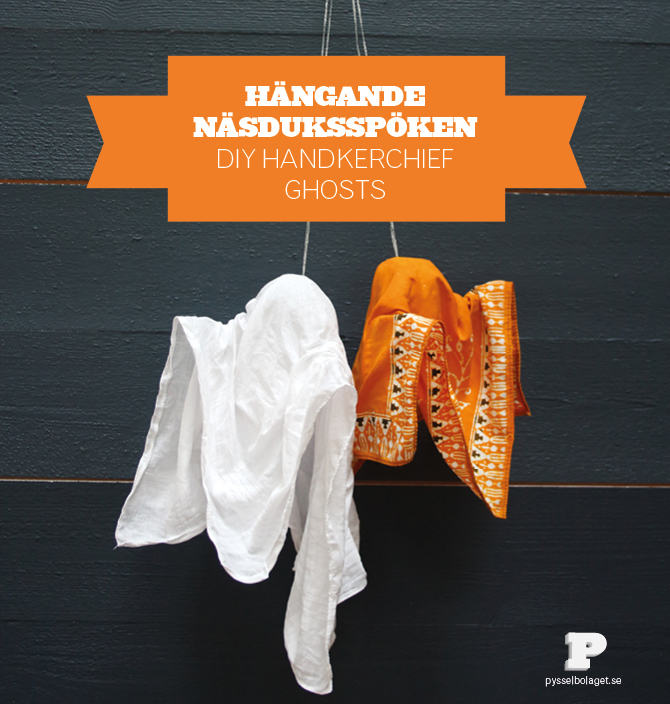
Halloween närmar sig med stormsteg och det är dags att väcka alla små sovande spöken. Ni som följer oss kanske såg våra näsduksspöken från förra året. De kommer att komma fram igen men de vill gärna ha sällskap! Förra årets spöken gjordes så att de kunde stå på bord och i hyllor. Idag gör vi näsduksspöken som ska hänga i huset.
———
Halloween is fast approaching and it is time to awaken sleepy little ghosts. Those of you who follow us may have seen our handkerchief ghosts from last year. They will be unpacked again, but they ‘d love to have company! Last year’s ghosts were made so that they could stand on tables and on shelve . Today we’ll make handkerchief ghosts to hang in the house.
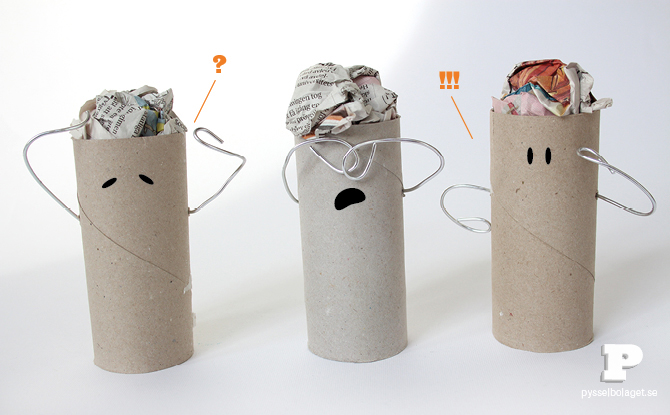
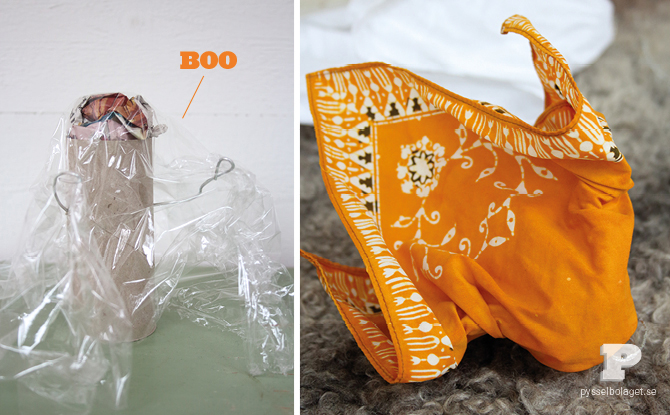
Ni behöver en ställning att forma spöket kring. Vi använder de ställningar vi gjorde förra året (ja, vi spara allt! Vem vet när man vill göra spöken nästa gång). Hur vi gjorde dem ser ni här! Ni behöver också näsdukar, tapetklister, plastfolie och en burk doppa tyget i. Näsdukarna har vi hittat i en second hand-affär för några kronor.
———
You need a mold to shape the ghost around. We use the molds we made last year (yes, we save everything, who knows when you want to make ghosts next time). See how we made them here! You also need handkerchiefs, wallpaper glue, plastic foil and a jar to soak the fabric in. We got our handkerchiefs from a second hand store, they were only a few bucks each.
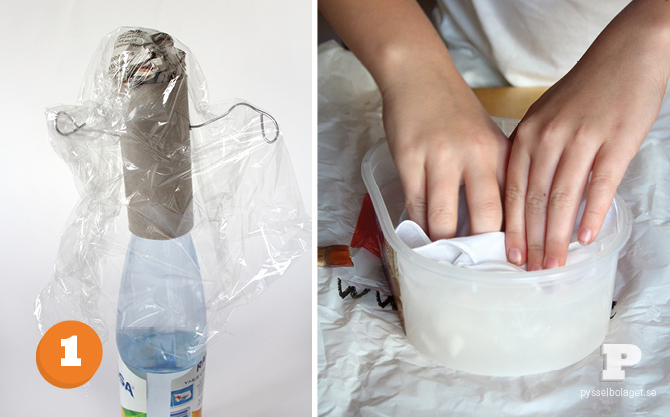
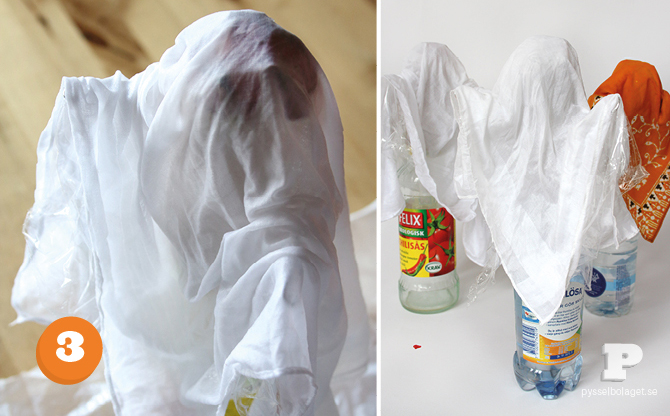
1. För att spöket ska se ut som om det flyger placerar vi ställningen på något högt, vi har valt en plastflaska. Flaskan är fylld med vatten för att stå stabilt och ställningen är täckt med plastfolie för att näsduken ska lossna lätt. Bland till tapetklister och doppa hela näsduken i klistret.
———
1. To make the ghost look like if it flies we place the mold on something high, we have chosen a plastic bottle. The bottle is filled with water to maintain stability and mold is covered with plastic foil to make the handkerchief come off easily. Mix the wallpaper glue and soak the handkerchief in it.
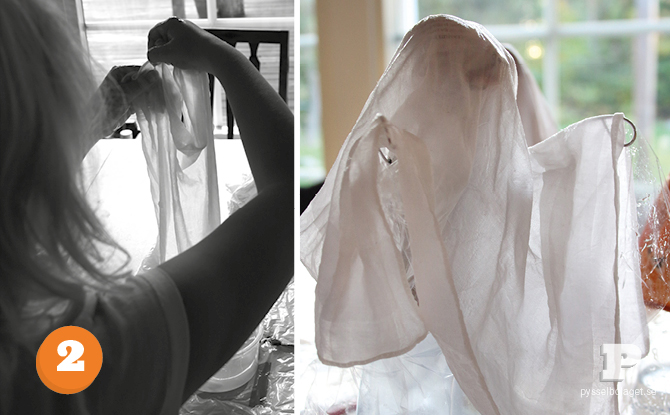
2. Se till att hela tyget är blött och häng det sedan över ställningen. Ett tips är att ställa flaskor och ställningar på en täckt bricka. Då är de lätta att flytta på när man städar undan.
———
2. Make sure the fabric is completely wet and hang it over the mold. You may want to place the bottles and molds on a covered tray. That way they are easy to move out of the way once you’re done.
3. När näsduken är på plats kan man med fördel forma veck och rynkor där man vill ha dem. Ställ sedan undan spökena för tork. Det tar ett par dagar för klistret att torka. Ha tålamod! Det är ingen idé att plocka av dem för tidigt.
———
3. When the handkerchief is in place, you can easily make creases and wrinkles in the fabric. Then set the ghosts aside for drying. Please be patient! It takes a few days for the glue to dry.
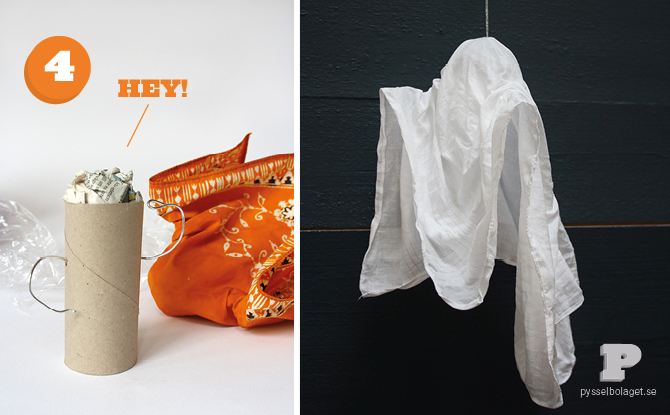
4. När klistret är helt torrt är det lätt att skala av tygskalet. Trä ett snöre genom huvudet på spöket och häng upp!
———
4. When the glue is completely dry, it is easy to peel off the fabric. Thread a string through the head of the ghost and hang it up!
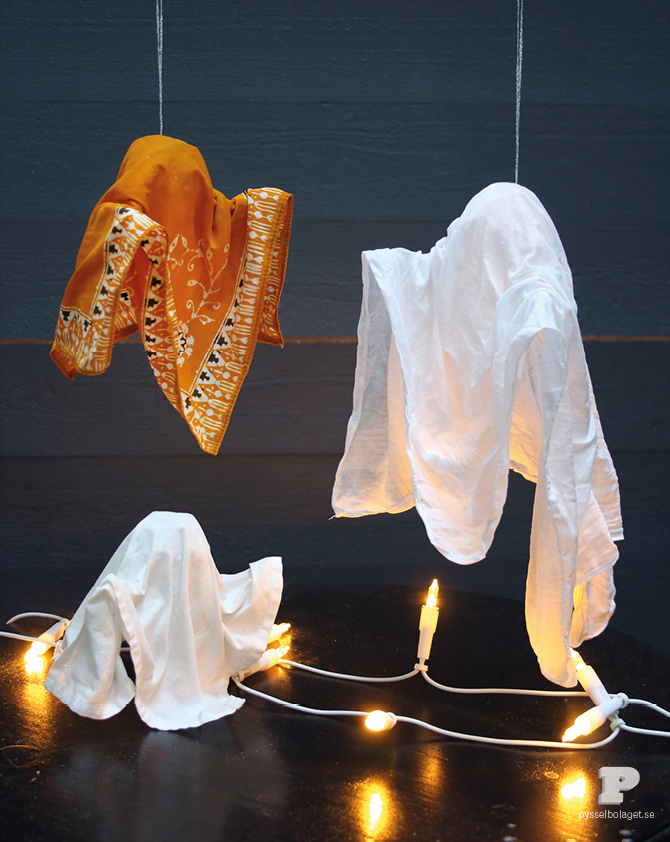
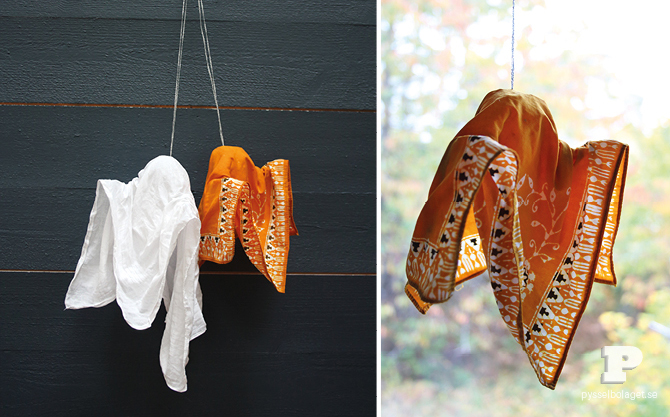
Våra nya spökvänner är färdiga och kommer att pryda väggar och fönster i vårt hus. Vill ni hellre göra spöken som kan stå på bordet, kolla in förra årets spökverkstad här.
———
Our new ghost friends are done and will decorate the walls and windows of our house. Would you rather make ghosts that can stand on a table, check out last year’s ghost workshop here.
Man kan också använda andra typer av stärkelse för att göra tygspöken. Vi valde tapetklister därför att vi hade det hemma. Kanske har ni andra bra förslag på vad som går att använda?
———
You can also use other starches to make handkerchief ghosts. We chose wallpaper glue because we already had it at home. Perhaps you have other good suggestions on what can be used?
Eftersom ställningen varit klädd i folie går de att använda nästa år igen! Härlig halloween önskar vi er!
———
Since the mold was covered in foil it can be used again next year! Have a happy Halloween!

14 Comments
Sara - mamma till två busungar
15 October, 2013 at 10:42 pmjag såg liknande spöke med stärkelse på en utländsk blogg i förrgår och försökte testa igår. då använde jag trälim o vatten, 50/50. 🙂 det har jag gjort förut med virkade dukar hängda över skålar med plastfolie så blir de stela skålar sen! så trälim o vatten funkar, sånt har man ju ofta hemma 😀
Karin & Freja
16 October, 2013 at 8:44 amTusen tack för det tipset, Sara! Håller sig dukarna vita? Jag har hört att vissa typer av stärkelse gulnar med tiden.
onel
17 October, 2013 at 1:17 pmThis is so smart and cute! The handkerchief with pattern works so well too, it looks like a black magician getting ready for a ritual 😉
How to make Handkerchief Halloween ghosts and milk carton houses | Recycled Crafts | CraftGossip.com
20 October, 2013 at 8:17 pm[…] These illuminated ghosts are too cute to be scary! Pop on over to the blog Pysselbolaget to see the awesome step by step cute tutorial on how to make recycled handkerchief illuminated ghosts. […]
How to make Handkerchief Halloween ghosts and milk carton houses | DIY Craft Projects
20 October, 2013 at 8:33 pm[…] These illuminated ghosts are too cute to be scary! Pop on over to the blog Pysselbolaget to see the awesome step by step cute tutorial on how to make recycled handkerchief illuminated ghosts. […]
How to make Handkerchief Halloween ghosts and milk carton houses | Crafty Central
20 October, 2013 at 8:55 pm[…] These illuminated ghosts are too cute to be scary! Pop on over to the blog Pysselbolaget to see the awesome step by step cute tutorial on how to make recycled handkerchief illuminated ghosts. […]
Crafty Time: Handkerchief Ghosts - Things To Do Yourself - DIY
21 October, 2013 at 6:55 pm[…] Hängande näsduksspöken / DIY Handkerchief Ghosts […]
Sharon
24 October, 2013 at 8:37 amI love these! Lisa and friends will be busy with these and the other handkerchief ghosts tomorrow evening at her pajama party 🙂
Karin & Freja
25 October, 2013 at 10:50 amI’d love to see that! Take plenty of pictures for me and wish Lisa a fantastic party 🙂
creativejewishmom/sara
24 October, 2013 at 2:30 pmSo much fun! Thanks for sharing on craft schooling sunday!
Karin & Freja
25 October, 2013 at 10:49 amThank you, Sara!
MONIKA
11 August, 2014 at 1:46 amGreat idea, i will use cheesecoth and fabric starch.
17 DIY Halloween Decorating Ideas for Kids on a Budget
7 September, 2018 at 5:07 pm[…] Tutorial Handkerchief Ghosts […]
25+ DIY Halloween Decorating Ideas for Kids
22 September, 2018 at 4:25 pm[…] Tutorial Handkerchief Ghosts […]