
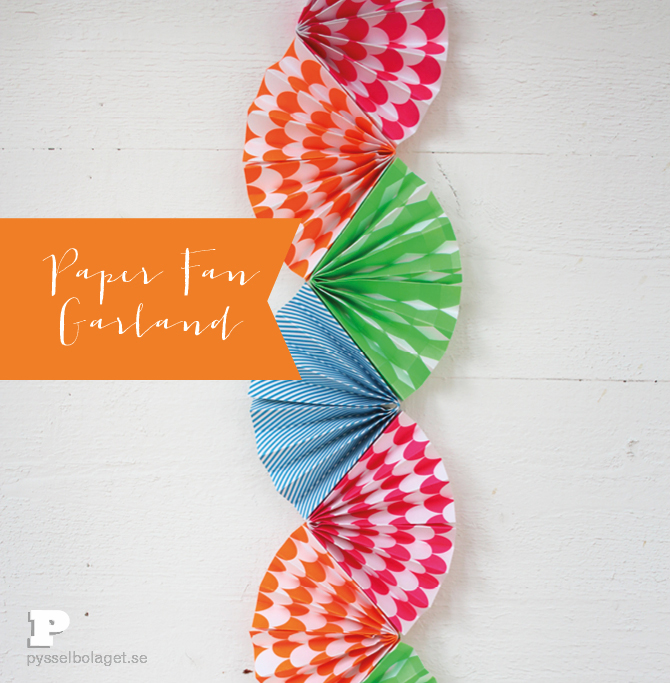
Today we want to share a simple but fun paper fan garland I learned from Linda at Djura Bok- och Pappersverkstad during our trip to Dalarna. Check it out!

You need thin paper, plain and patterned, double sided tape or glue and scissors.

1. Start by cutting the paper into squares. We use different sizes of paper, mine are small, only 7.5 x 7.5 cm. Freja has chosen a larger size, hers are 15 x 15 cm. Then fold back and forth until you folded the whole paper.
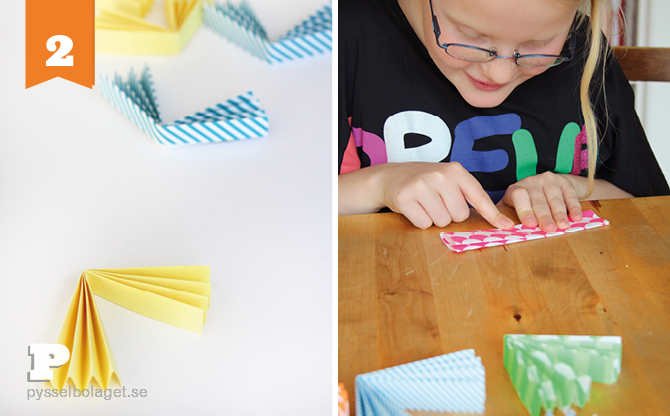
2. Fold the folded stack in the middle…
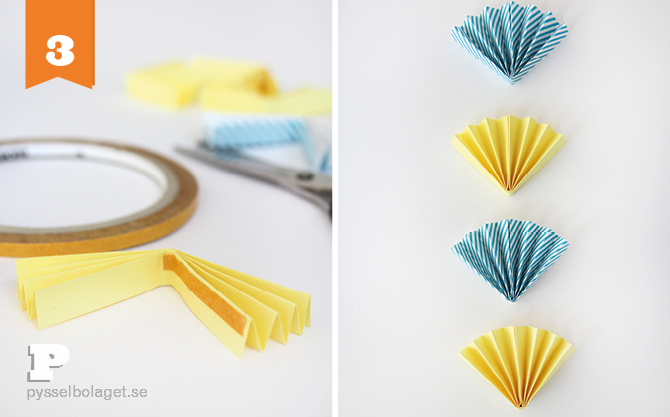
3. … and tape it togheter with adhesive tape. You now have folded a small fan.
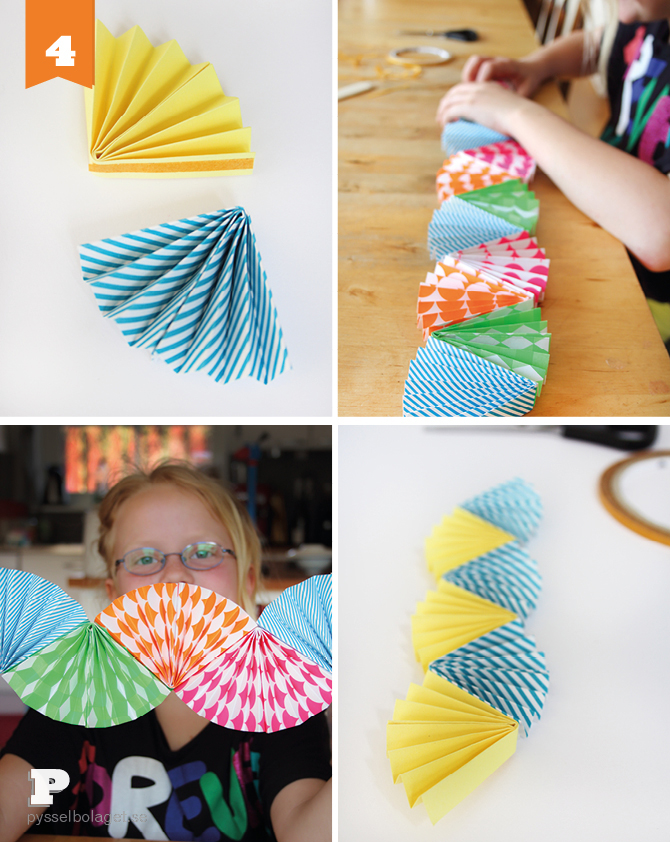
4. We made a bunch of small fans before we put them together. We then use adhesive tape again to assemble them. We tape them to each other with the openings in different directions, the patterned once have the opening to the left and the solid color ones have the opening to the right. Fun, don’t you think!
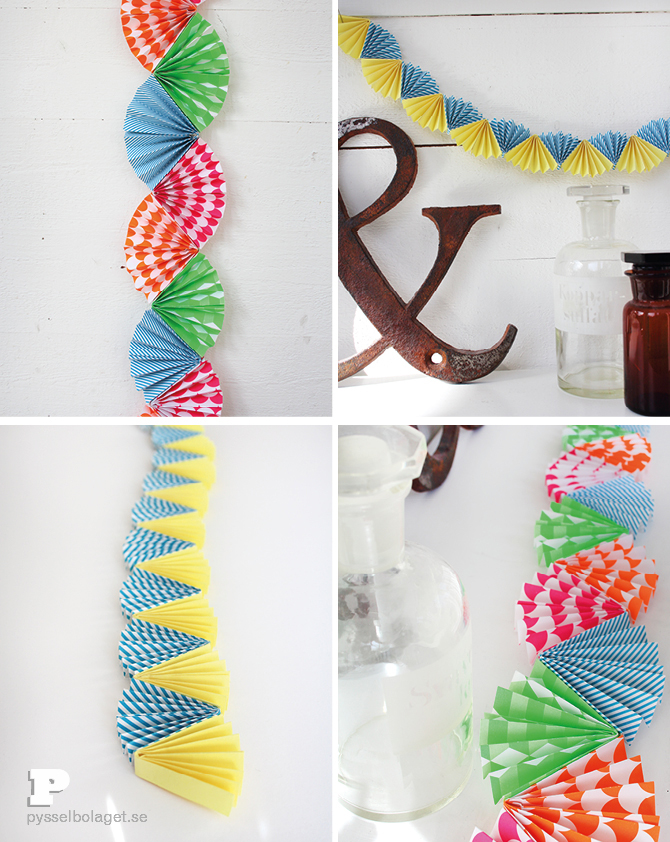
The garland can be varied in color and size, with solid colored paper only or solely patterned. At the blog Oh Happy Day you find a more advanced version of our garland and Linda have a necklace in the same technic on her Pinterest board.

2 Comments
creativejewishmom/sara
2 May, 2014 at 10:53 amGorgeous and so great for all ages! thanks so much for sharing on craft schooling Sunday!
Ms. Peppy
4 June, 2014 at 6:15 pmThat is super cute. We are always looking for fun crafting ideas as well as birthday decorations.