

Idag är det dags för ett riktigt papperpyssel. Jag och Freja lärde oss att vika de här stjärnorna i förra veckan och det blev omedelbar kärlek. Det kanske ser komplicerat ut men Freja viker sina stjärnor helt själv. Ett pyssel man kan göra med skolbarn, helt enkelt. Fram med färgade papper och tålamod så kör vi!
Ni behöver 14 stycken tunna färgade papper klippta i fyrkanter.

1. Vik pappret på mitten och diagonalen. 2. Vik sedan in alla hörn mot mitten. 3. Nu ska ytterkantens flikar vikas in. Pappret ser nu ut som en drake. 4. Vänd på draken och vik ner överkantens flik. 5. Till sist viker ni ihop draken med den nya lilla fliken utåt.

6. Stjärnans första stråle är klar. Nu ska det vikas 13 stycken till!

7. Nu ska strålarna sättas ihop. Jag hoppas att ni ser på bilden hur det ska funka. Flikarna från den ena strålen petas försiktigt in i det lilla viket på den andra strålen, en flik på var sida.

8. Strålarna flätas ihop allt eftersom de blir klara. Det är en fördel att hålla till på bordet, strålarna glider i det här läget gärna isär.

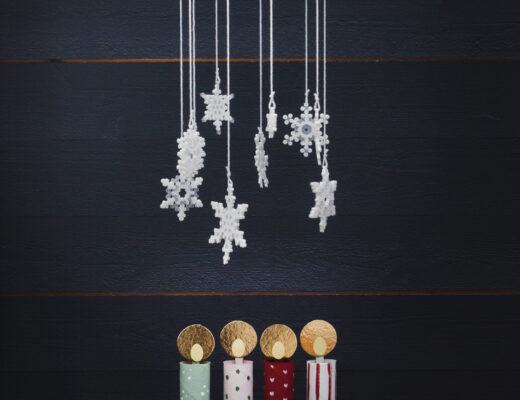
9. När alla strålar är på plats kan man försiktigt trycka ihop stjärnan så att cirkeln i mitten blir jämn och fin. Stjärnan är nu färdig men rätt ömtålig. Vi har därför klistrat våra stjärnor. Klistra inte strålarna alltefter de är färdiga utan vänta tills alla strålar är klara. Stjärnan behöver justeras och klämmas ihop när alla strålar är på plats och klistret torkar snabbt.

Vad tycks!

Det tar sin lilla stund att vika 14 strålar men varje stråle är lätt. Både jag och Freja tyckte att det var superroligt att göra stjärnorna och vi är mycket nöjda med resultatet.
Today it’s time for a real paper crafts. Freja and I learned to fold these stars last week and it was love at once. It may look complicated but Freja folded her stars all by herself. A crafts you can do with school children. Bring out colored paper and some patience!
You need 14 pieces of thin colored paper, cut into squares.
1. Fold the paper in half withwise and in the length direction. 2. Then fold all the corners toward the center. 3. Now fold the outer edge flaps into the middle. The paper now looks like a kite. 4. Flip the kite over and fold down the upper flap. 5. Finally, fold up your kite in the middle with the new small flap facing outward.
6. The star’s first beam is done. Now just fold 13 more!
7. It’s time to put the beams together. I hope that you see in the picture how it should work. The flaps from one beam folds gently into the small flaps on the other beam, a flap on each side.
8. Intertwine the beams as you do along but keep your work on a table, the beams easily falls apart.
9. When all the beams are in place, carefully compress the star so that the circle in the center is smooth and round. The star is now ready but quite fragile. Therefore, we have pasted our stars. Do not glue the beams until they’re all ready. The star needs to be adjusted and clamped when all beams are in place and the glue dries quickly.

Like it? It takes little time to fold 14 beams but each beam is easy. Both Freja and I thought it was super fun to make the stars and we are very pleased with the results.

43 Comments
Alessandra
23 November, 2012 at 9:30 amLove at the first sight!!!! thank you girls!!!
xxx Alessandra
Helena, Craft and Creativity
23 November, 2012 at 6:55 pmHelt otroligt fina! Jag kan inte sluta vika. Håller på med min tredje stjärna nu. 🙂
Annika GW
24 November, 2012 at 12:55 amDen stjärnan ska jag göra som dekoration i våran trappuppgång!/ Annika
Lotta
24 November, 2012 at 4:36 pmOj vad fina, det ska jag prova med min 9-åring, men var får du tag i alla fina papper?
Hälsn Lotta
Karin & Freja
25 November, 2012 at 4:50 pmLotta, jag köper gärna papper när jag är utomlands men både cchobby.se och kreatima har origamipapper. VI har också köpt papper i A4 format i en affär som heter TGR, den finns på några ställen i Sverige. Har man tålamod att klippa till alla bitar måste det funka även med fina presentpapper. Lycka till!
Linda
24 November, 2012 at 11:24 pmVilka underbara stjärnor!!
Karin & Freja
25 November, 2012 at 4:50 pmTack Linda!
Novemberläsning/Book review | Pysselbolaget
27 November, 2012 at 8:03 am[…] Stjärnor i origami/Origami paper stars […]
Åsa
28 November, 2012 at 9:40 amså himla fina stjärnor. ska absolut göra. tack för tipset. här ska vikas!
Karin & Freja
29 November, 2012 at 11:08 pmLycka till!
Julpyssel 4 | Hildurs Barnbarn
2 December, 2012 at 9:46 pm[…] men med Frejas hjälp gick det lätt som en plätt! Ni hittar beskrivningen på denna stjärna på Pysselbolagets […]
Origamistjärnor – Origami paper stars | Craft & Creativity
3 December, 2012 at 3:57 pm[…] att 8-åriga Freja lärde mig och min äldsta dotter att vika vackra papperstjärnor. Du hittar en toppenbra beskrivning på hur man viker dem finns hos Pysselbolaget, med bilder och allt. — Another fun thing we […]
vita_margarita
4 December, 2012 at 10:17 pmJättefina…så jag gjorde ett eget försök, fast i ett annat material: http://vitamargarita.blogspot.se/2012/12/stjarnor-i-natten.html
Karin & Freja
5 December, 2012 at 9:04 amDe blev verkligen superfina i bokpapper! Tack för tipset och för att du länkat tillbaka till oss.
Julskaparna - 5 december
5 December, 2012 at 10:03 am[…] julkul: Vik en stjärna i papper. 0 […]
Fröken iDA
6 December, 2012 at 5:33 pmSå otroligt fina! Tack för tipset! Här ska det vikas i skolan ska ni tro!! 🙂
Karin & Freja
6 December, 2012 at 8:38 pmSå roligt! Lycka till!
Kreativ-Links, Teil 31: Christmas-Special – Abraxandria
6 December, 2012 at 5:41 pm[…] Canes, Weihnachtskugeln bekleben, lovely Advents Calendar Houses, Papierstern-Verschönerung, Origami Sterne, Christmas Felt Tree, Recycled CD Glitter Snowman, Easy Knotted Rock Ball […]
Origami-Sterne – Abraxandria
7 December, 2012 at 11:05 am[…] und klebt sie etwas zusammen, damit der Stern nicht auseinander fällt. Die Anleitung habe ich hier gefunden, auf einem tollen schwedischen Blog. Das Papier ist links von Tiger und rechts von […]
pam
12 December, 2012 at 7:28 pmWhat a fantastic tutorial! thank you 1,000 times. I received a star like this one years ago as a gift. I have always wanted to know how to make one myself.
I am very excited to begin!!!
Karin & Freja
13 December, 2012 at 11:28 amThank you! We’ve had so much fun folding our stars and I always love when it looks complicated but is easy!
Melissa
13 December, 2012 at 3:03 amMade my first star two days ago. Absolutely loved it! I used eleven inch paper which yeilded a large beautiful star.Origami is addictive. 🙂
Karin & Freja
13 December, 2012 at 11:49 amIsn’t it! We’ve folded a whole bunch of stars already and we absolutely love it. Freja is also teaching all her friends, so it’s not just addictive, it’s contageous!
Noch mehr Weihnachtssterne – Abraxandria
13 December, 2012 at 11:18 am[…] auch schon von der Decke hinab und drehen sich fröhlich. Die Anleitung habe ich übrigens hier […]
Ellen
15 December, 2012 at 2:45 pmSå himla himla bra!!! Såhär fin blev min stjärna! http://ellenfilippamaria.blogg.se/2012/december/origami-paper-star.html
DIY Christmas origami star ornament «
16 December, 2012 at 10:55 am[…] all the ones I’ve seen in the shops, I haven’t found one that I like. So when I found a tutorial on how to fold this origami star the other day, I made my own out of some wrapping paper I had […]
DIY julestjerne - jule origami | Julegaver laver man da selv - Gør det godt - selv
18 December, 2012 at 1:07 am[…] til foldning af julestjerne / juleorigami – https://pysselbolaget.se/2012/11/23/julstjarnor-i-origamiorigami-paper-stars/ Leave a Reply Klik her for at annullere svar. Note: All fields are […]
paper stars | modflowers ✿
24 December, 2012 at 2:07 am[…] simple squares of thin paper and origami folding. Rather than reinvent the wheel I have included a link to an excellent tutorial I found online which illustrates the folding process. There are […]
Qualche link per il week end « moms in the city
4 January, 2013 at 8:09 am[…] cominciando a pensare a feste di compleanno e a decorazioni da creare, stella di origami […]
Christine
19 March, 2013 at 10:24 pmhej hej sweden!
i love those stars, so beautiful..not just for christmas.
thanks a lot for the great tutorial.
stora kramar from berne/switzerland
christine
Karin & Freja
25 March, 2013 at 2:55 pmThank you for taking the time to leave us acomment, Christine! I agree, the stars work all year around!
Sterne basteln | katnissdean
8 April, 2013 at 1:22 pm[…] durch Abraxandria, die in ihrem Artikel Origami-Sterne vorstellte. Die Anleitung findet sich auf dieser Seite. Nicht erschrecken, die Bilder sind hut erklärend und zudem gibt es unten eine englische fassung […]
Sterne falten – Weihnachtsvariante | katnissdean
9 November, 2013 at 9:42 am[…] diesem Beitrag hatte ich euch schonmal die hübschen Sterne gezeigt, die ich auf dieser hübschen Bastel-Seite gefunden […]
Susanna
16 November, 2013 at 10:43 pmGrazie , thanks you are super!
Karin & Freja
18 November, 2013 at 11:42 amThank you!
Det bästa med helgerna! | Mi vida, mi forma
24 November, 2013 at 8:14 pm[…] Här finns beskrivningen till hur man gör stjärnan: julstjärna […]
Stjärnor i origami | Bara jag
4 December, 2013 at 12:09 am[…] på er! Jag tittar bara in lite kort för att tipsa om ett pyssel jag hittat på en blogg. https://pysselbolaget.se/2012/11/23/julstjarnor-i-origamiorigami-paper-stars/ Egentligen hittade jag pysslet hos Jess som jag följer. Men beskrivningen kommer från […]
Original DIY Origami Paper Stars
11 December, 2013 at 10:49 am[…] Source: craftandcreativity, pysselbolaget […]
Wilma
3 January, 2014 at 7:44 pmHej!
Jag tycker att de här stjärnorna är superfina! Jag vet att jag provade att göra en sån här stjärna för något år sedan men jag hade inget papper så jag använde servetter istället. Jag tror aldrig att jag gjorde färdigt den, men det kan ju vara ett bra tips om det är lite tomt med papper hemma.
Kramar Wilma
Karin & Freja
7 January, 2014 at 2:39 pmTack för tipset, Wilma! Det händer ju att man har slut på vanligt papper. Jag har också sett stjärnor i tidningspapper och tapetbitar.
Hälsar Karin
Kim
3 December, 2014 at 12:29 amThank you so much for your tutorial, I’m heading to the shop now to buy some paper to make these beautiful stars for my home
Karin & Freja
4 December, 2014 at 4:48 pmEnjoy!
2 december – onsdag | PixelCats adventskalender
3 December, 2020 at 3:16 am[…] Vill du vika en enkel pappersstjärna med 14 uddar? Följ länken nedan så hittar du en beskrivning med tydliga och fina bilder. (Jag har prövat att vika en tillsammans med några barn i tioårsåldern, och det var inga som helst problem.) Allra bäst blir den om man använder ett lite tunnare, blankare papper, gärna kvadrater klippta ur julklappspapper: https://pysselbolaget.se/2012/11/23/julstjarnor-i-origamiorigami-paper-stars/ […]